|
猜你喜欢: 精致的五角海星手工折纸实拍教程 简单儿童折纸皱纹纸康乃馨 送妈妈的妇女节礼物 山崎迷你玫瑰花折纸教程图解 慕尼黑兰花折纸图解教程 皱纹纸手工制作漂亮家居装饰纸艺花 荷花花瓣的折纸方法-儿童折纸视频教程 母亲节折纸韩式康乃馨纸艺制作教程 超级简单的莲花灯折纸实拍图片教程 超级简易的清新纸花手工制作教程 纸艺纸藤手工DIY漂亮郁金香的制作方法教程 |
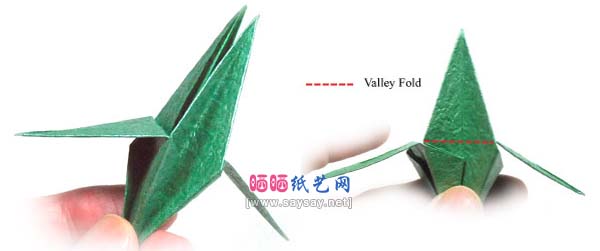
37.Apply the valley-fold of the step #35 to the rest of two sepals.
38.The four sepals are ready.
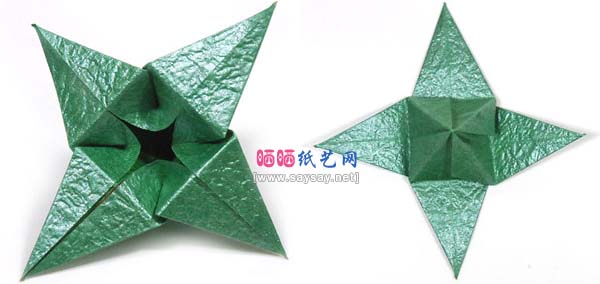
39.This base is called "standard base".
40.Push the top firmly while rotating it slightly in the counter-clockwise direction.
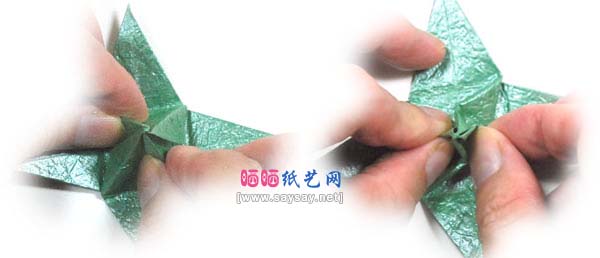
41.Push it firmly until your fingers touch the bottom.
42.The structure of the candlestick base I is now completed.
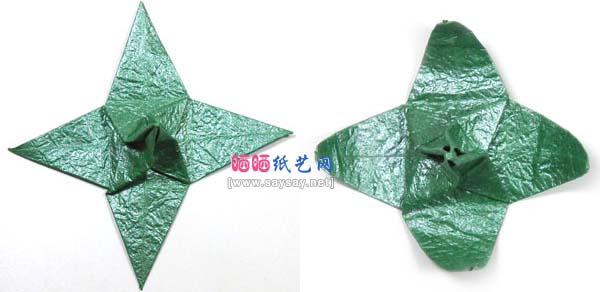
43.Curl all four sepals.
44.You can insert the top of base into the bottom of the rose.
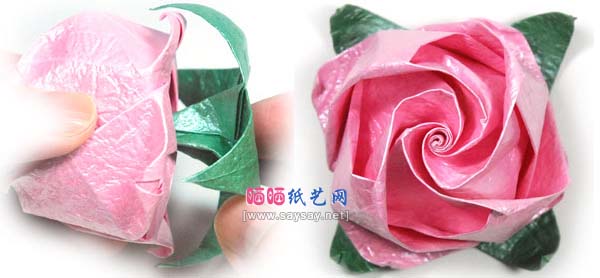
45.This is the top view of the rose with base.You can use this base for any roses (QT, Swirl, Standard, Spiral, or Kawasaki).
46.This is the bottom view.
47.Congratulation! You've done it.


")