|
猜你喜欢: 圣诞树折纸方法CP图纸教程 手工制作圣诞树组合折纸diy教程 简易圣诞树折纸图解教程-儿童折纸系列 JoNakashima的逼真橡子手工折纸教程 逼真立体松果手工折纸教程 松果手工折纸图解教程 桃谷好英迷你圣诞树折纸图解教程 可爱的折纸松果 松鼠的最爱 实拍anywaybreak连体玫瑰花折纸教程图解 实拍带荷叶的睡莲花的折纸方法 纸艺制作教程大全 |
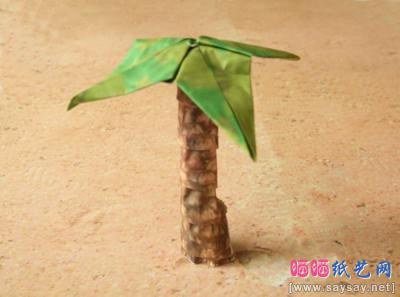
棕榈树折纸图成品图欣赏
棕榈树折纸的详细步骤如下所示:
This palm tree is made of 2 square pieces of paper. 这种棕榈树是由2个纸见方的小块。
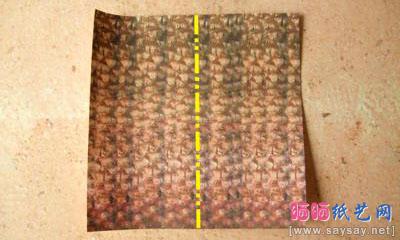
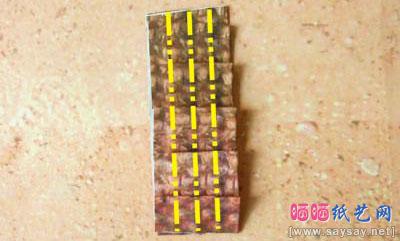
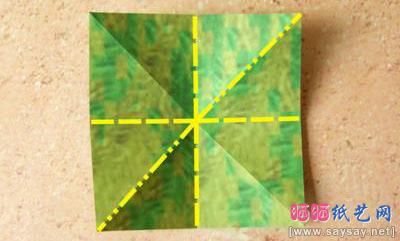
Step 1: 第1步:
This paper is for the tree trunk. 本文是在树干上。
The size is 6x6 inch. 尺寸为6x6英寸。
The backside of the paper is white. 纸张背面的是白色的。
Make a mountain-fold over the yellow line. 请在黄线山倍。

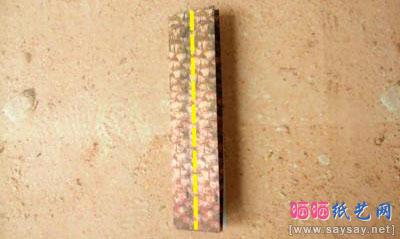
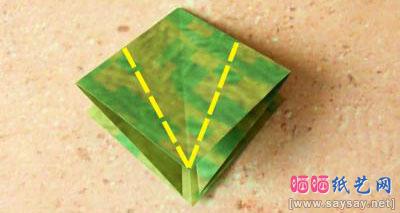
Step 2: 第2步:
Make a valley-fold over the yellow line. 请在黄线山谷倍。
Make this fold over both layers of the model. 使模型这两个层倍以上。
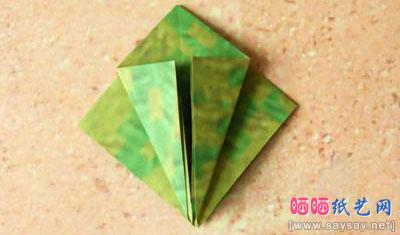
Step 3: 第3步:
Make a valley-fold over this line. 使这条线一折多山谷。
Make this fold over all the layers of the model. 使模型在这个圈里的所有图层。
Unfold this fold after you made it. 展开后,这个圈里你来了。
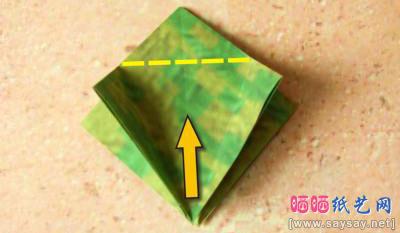
Step 4: 第4步:
Make a valley-fold over these 2 lines. 请对这些2线山谷倍。
Make these folds over all the layers of the model too. 模型也使这些褶皱层以上的所有的。
Unfold each fold after you made one. 每个折叠展开后作出的。
Step 5: 第5步:
Turn the model. 转动模式。
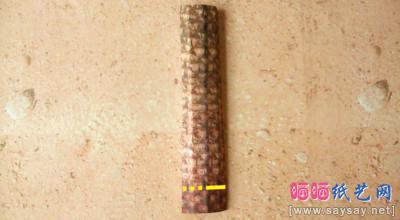
Step 6: 步骤6:
Fold the piece below to the backside of the model 下面一块折叠的模型背后的
by making a mountain-fold over the yellow line. 通过使在黄线山倍。
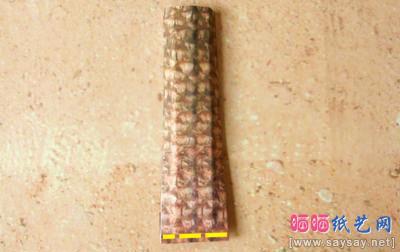
Step 7: 第七步:
Fold the piece of step 6 back to the frontside of the model 折叠后片步骤6到模型的前端
by making a valley-fold over the yellow line. 由黄线,使在一个山谷倍。
This line is just a bit above the bottom of the model. 此行只是有点高于模型底部。
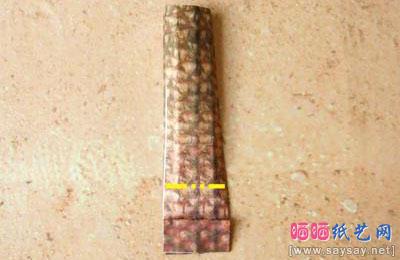
Step 8: 第八步:
Repeat steps 6 and 7 a few more times until you 重复步骤6和7几次,直到你
reach the top of the model. 到达顶部的模式。
Start at the yellow line in this picture. 这张图片开始在黄线研究。
{NEXTPAGE}
Step 9: 步骤9:
Make a triangular tube of the model by making 请管通过利用该模型三角
a mountain-fold over these lines. 山倍以上这些行。
Leave a part of the bottom of the tree trunk open, 给一个开放的一部分,树干底部的树,
see the opening on the right in the picture of step 10. 看到开幕的10步右侧的图片。
This is to make the tree trunk stand more solid. 这是为了在树干上的立场更加稳固。
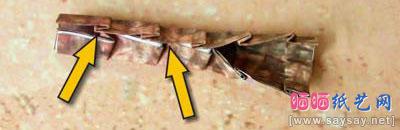
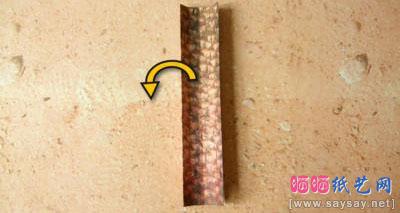
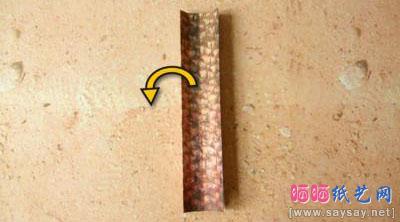
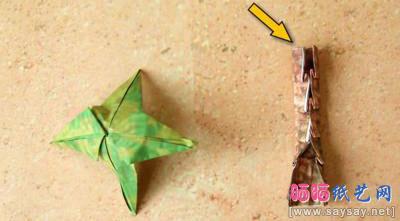
Step 10: 第10步:
If you like, you can glue the edges of the tree trunk 如果你愿意,你可以胶水树干边缘的
together on the places that are indicated with 一起与地方标明
an arrow. 一个箭头。
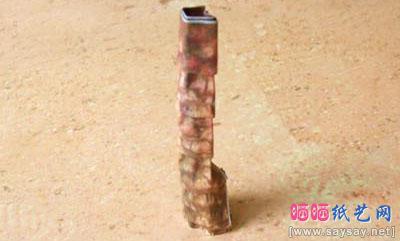
Step 11: 第11步:
The tree trunk is ready... 在树干上已准备好...
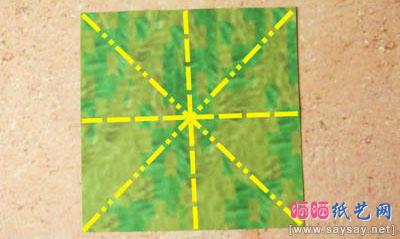
Step 12: 第12步:
This paper is for the part with the leaves. 本文是为与叶的一部分。
The size is 4,5x4,5 inch. 大小是4,5 × 4,5寸。
Both sides of this paper are coloured. 本文两侧是彩色的。
Make mountain- and valley-folds over the 4 lines. 使山区和河谷4线,可折叠的。
Unfold each fold after you made one. 每个折叠展开后作出的。
Step 13: 第13步:
First, make a valley-fold over the 2 lines below, on the right. 首先,制造,右边一折叠,下面的山谷,2线。
Then, make a mountain-fold over the 2 lines in the middle. 然后,在中间线以上山区的2倍。
And make a valley-fold over the 2 lines on top, on the left. 而制作,在左边的一个折叠山谷顶2行的。
Now you get a basic-shape. 现在,你获得一个基本形。
Step 14: 第14步:
Make a valley-fold over these 2 lines. 请对这些2线山谷倍。
Make these folds over the upper 2 layers of the model. 使模型在这些褶皱上2层。
Step 15: 第15步:
Unfold the folds you made in step 14. 展现在你14倍的一步。
Step 16: 第16步:
Pull the end at the bottom of the arrow up by making 拉动结束的箭头底部向上通过使
a valley-fold over the yellow line. 山谷倍以上的黄线。
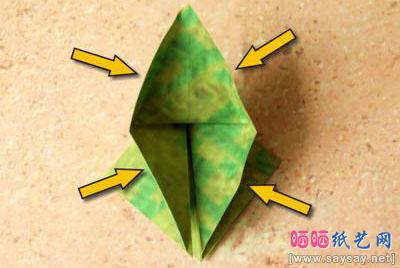
Step 17: 第17步:
Press the edges that stand upwards down, see arrows. 按向上的边站了下来,见箭头。
Use the folds you made in step 14 as help-lines. 您使用的褶皱线在步14帮助。
{NEXTPAGE}
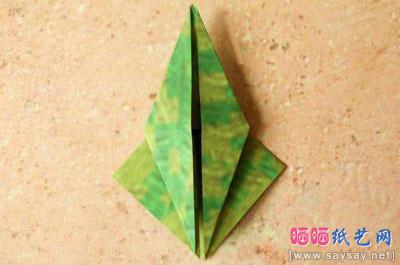
Step 18: 第18步:
Now the model looks like this. 现在看起来像这样的模型。
Repeat steps 14 to 17 on the backside of the model. 重复步骤14至17日在模型背后的。
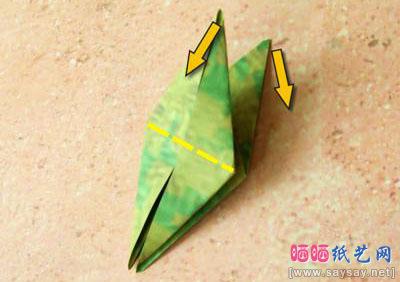
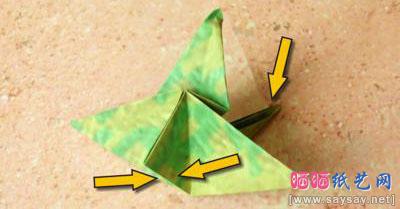
Step 19: 步骤19:
Pull the ends at the 2 arrows a bit down, so they 拉完在第2箭有点下降,所以他们
stand straight towards each other. 直冲对方的立场。
Step 20: 步骤20:
Press the pieces at the 2 arrows below against each other 按下面的作品互相在第2箭
with one hand. 用一只手。 Then, press the piece at the arrow on top 然后,请在顶部的箭头片
upwards with your other hand. 用另一只手向上。
The end becomes flat when you press it upwards. 最终变得平坦,当您按下向上。
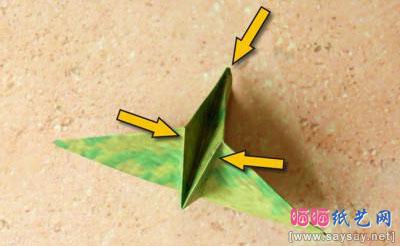
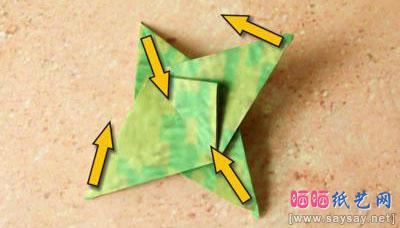
Step 21: 步骤21:
Repeat step 20 for the other end that is indicated with 重复步骤20月底的指示与其他
the arrow on the right. 右箭头上。
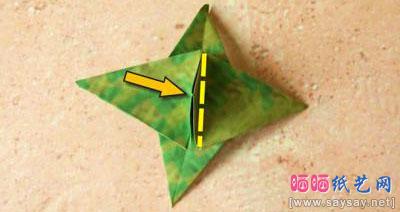
Step 22: 步骤22:
Press the end at the arrow down by making a valley-fold 按箭头的制作结束下跌山谷倍
over the yellow line. 在黄线。
Step 23: 步骤23:
Curl the 4 ends around a pencil or a finger. 卷曲或4个手指左右结束铅笔。
Turn the model. 转动模式。
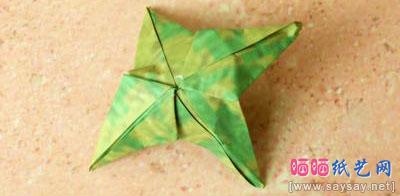
Step 24: 步骤24:
The top of the tree is ready... 树顶部的准备..
Step 25: 步骤25:
Add glue to the upper-edge of the tree trunk, 新增胶到上干边的树,
see arrow. 见箭头。
Lay the top of the tree on the edge with the glue 莱胶边与顶部的树
and glue both pieces together. 和胶水都拼在一起。
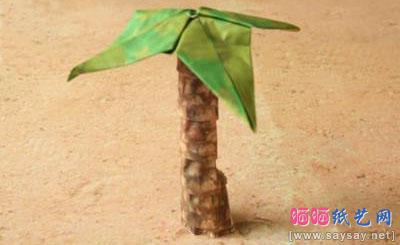
The palm tree is ready! 棕榈树是准备好了!


")